You must learn how to change water softener resin because this is an expensive service if you have a plumber or technician do it for you. You can learn how to complete the process on your own if you get to know the softener and how the resin and resin bed has been put together. You will need to find a place to buy the materials that you need, and you could have it all delivered to your house for this job.
A Step By Step Guide
You can take a look at the process here if you would like to see a picture of each step. You will find that you can do this job quickly if you have done your homework ahead of time. Most people who are replacing their own resin need a couple hours to complete the job so that it can be done carefully and simply.
Measure The Tank
You need to take a look at your tank to check how much resin you need. If you are unaware of how a water softener works, there is a valve at the top that will let water flow through the resin that is in the middle.

The hardening ions in the water are exchanged for sodium ions that are in the resin, and the water passes through the charcoal to treat it for taste. That is in the bottom of the tank, and you will see water flow up through the softening tube back into your house.
You might read the user manual for the softener, or you can check the amount of resin that is removed from the tank itself. Most tanks are put together in the same way, and you simply need to check to be sure that you have the right amount of resin as prescribed by the company that made the tank.
Measure the tank to be sure you have gotten enough resin, and order your resin online before beginning. You cannot do anything until you know you have enough resin. It is much cheaper to order yourself, and it can added quickly.
Order Your Resin
Be certain that you have chosen a resin that is meant for use with your tank. You cannot buy the cheapest resin just because you want to save money. You owe it to yourself to use resin that is specific to your tank or your situation.
Turn Off The Water Valve
You must close the water valve and wait for the water to stop flowing or making any sound in the tubes. The valve should be closed completely, and you need to be sure there is no dropping before you continue.
Remove The Water Tube
You must detach the water tube from the softener.
It will slide back into the tank when the time comes, but you must have the chance to work with the tank alone so that you do not damage the water pipe.

Remove The Old Resin
You will turn off the water to the tank, and you will remove the top lid of the tank so that you can reach the resin. The resin is sitting in the tank loose, and it must be pulled out using a rubber glove. You could wear latex gloves, and you must pull out all the resin until you see the gravel in the bottom of the tank. The gravel in the tank needs to be shaken out, and you can begin to pour the resin back in.
The resin is very sticky, and you must take care to remove the resin without tugging at the soft tube in the middle. Do not get any resin in the soft tube when you are removing the resin, and toss the old resin aside.
Replace The Resin

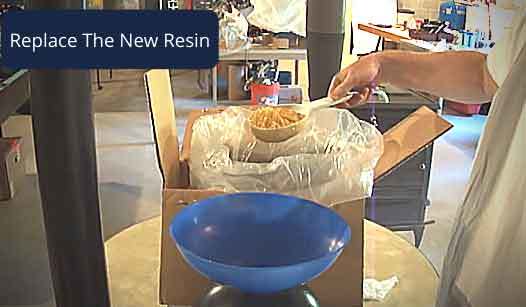
You can replace the resin in the tank by pouring it from the vessel you have bought over the gravel. You need to pour in the resin so that it completely fills the tank to all sides.
It must rise almost to the top, but there needs to be some clearance in the top of the tank that will allow the water to sit as it falls into the base of the tank.
You must be careful to not get any resin in the soft tube as you are pouring it in. You can pack it in carefully, and you must be sure that it does not bend the soft tube or force it to change paths. Someone who has never opened a water softener tank before might be concerned about damaging the soft tube, and you should move slowly so that you do not bend or dent this tube.
The Lid Should Be Closed
You can close the lid on the tank tight, and you might need a screwdriver to tighten any screws that hold it in place. You also need to be sure that you do not have any leakage when you have turned the water back on. You should watch the tank when you have replaced the resin to be sure you do not get leaks, and you should listen for the water that flows back into the house.
Here is a full video guide about how to replace water softener resin.
Conclusion
You can replace your own resin if you are familiar with the water softener tank and know how to complete this process. You need to be sure that you have had a look at the instructions so that you can see how the water is turned off, how the lid is removed, and how the resin is removed.
You will replace the resin with something you bought yourself, and you must be sure that you have not gotten any of the resin into your soft tube. Shake out the gravel in the bottom of the tank, and close it all up to have water flowing in the house again. Was this walkthrough helpful? Any comments are welcome.
